
Close
3D rendering
CNC machining
3D Printing
Repurpose and reusing
Non-toxic materials
Close
3D rendering
Best viewed in landscape (tilt) mode, on mobile.


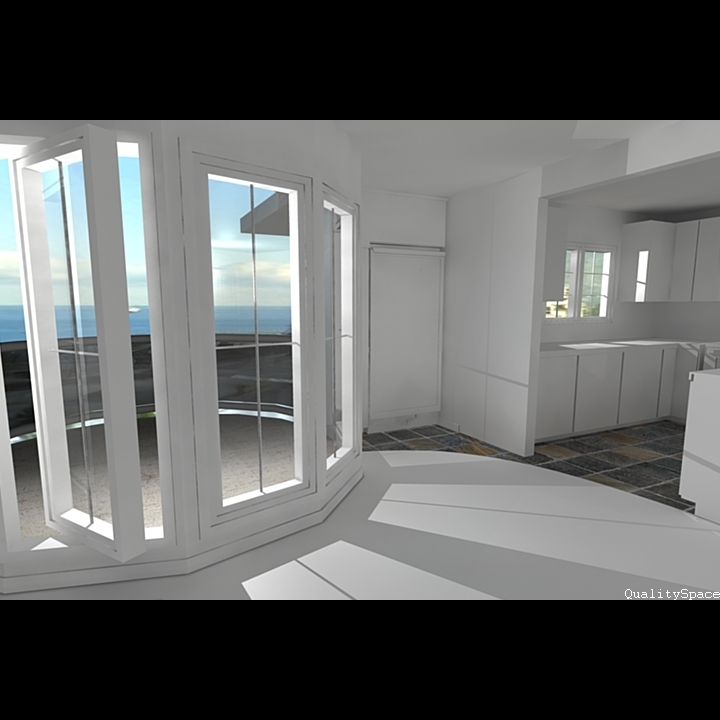
3d rendering can be use as a visualization tool to accelerate a STRATA decision, showing a preview of the work to be done,
TIP: Let them argue the colors AFTER the work has started.


Another feature, radiosity, gives you a multi color interaction preview.
Understand radiosity; hold a red cardboard next to a white wall or floor and the red will bounce onto it. Now depending on the scale and openness of the space, it can affect the next room, changing a beige into a greenish tint. Even the outdoor greenery can affect the colors.
Another 3D option is reviewing the planned space(s) / object(s) / light(s) in an interactive 3d picture. Changes can be done and have the image mail to you for a rapid real time-esque 3d interactive evaluation.

Walk around, rotate and visualize your project at your own pace in any direction from a self contained 3d picture, a qualitySpace.ca only feature. No installation, just open the picture then use your mouse to navigate.
QualitySpace.ca will design floor plans and 3d objects/ furniture, with textures (woods, fabrics, stones, or any pictures) if needed .
You also have access to hundreds of 3d objects… tables, couch, beds, piano, plants etc from our generic fully scalable library or, bring your own.
Should you put a pony wall here, how far, will the piano fit or look too busy ?
ps The rounded floor 3d picture(s) on this page was 3d made to evaluate and decide the curve direction.
Its a fairly accurate fast approximation (from memory) of the space, then, realized…..the window should open and pivot …. customer loved it.
These are some of the 3D rendering features that are now at your disposition.
CNC machining
Cut anything, glass, wood, marble , steel, etc with laser precision.
Create precise mix materials inlays for example, or create art from your own “napkin” drawing, from scanning it to layout then cutting or sculpting…

Most CNC table sizes are able to handle 4 ft by 8 ft by 6 inch deep and more.
The pricing depend on time/materials and type of machine (cnc, water jet, plasma etc.).
Cutting styrofoam at a foot per second is a lot cheaper than 4 inch thick steel.
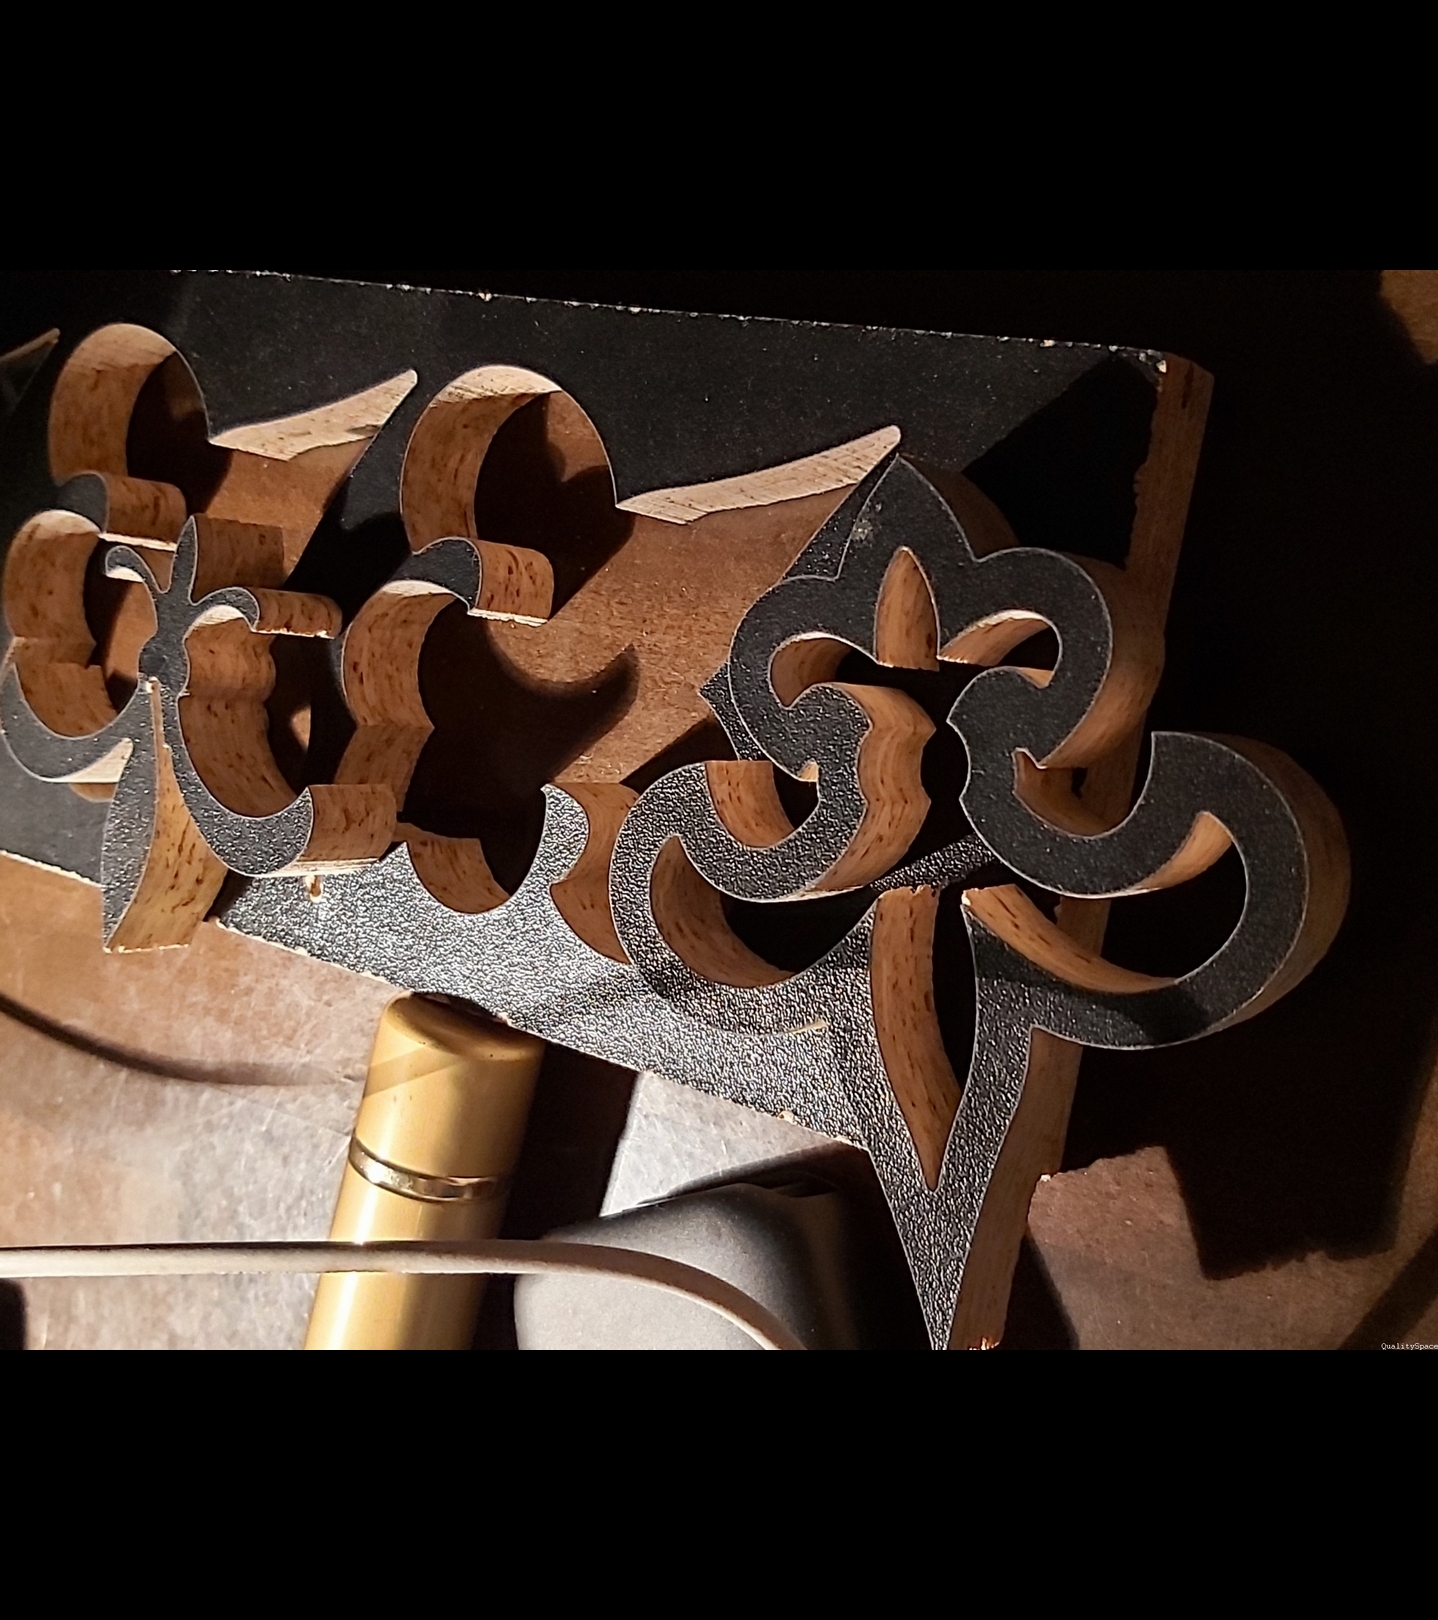
The black fleur ( flower ) de lys cutout here was made using a waterjet table and yes , it is made of melamine.
The CNC’s automatic interchangeability of different bit shapes on the same subject real time makes it possible to carve something as intricate as a human face.

3D Printing
3d printers are used to replace, replicate or for new objects creation. Print From different materials and in multiple colors.
Plastics and metals are common and there are new comers as in wood paste etc.
You can also use a combination 3D scanner (portable ones can scan car sizes) then cut and scale a needed part for repair for example and 3d print. You can also 3d print a mini you in that way.
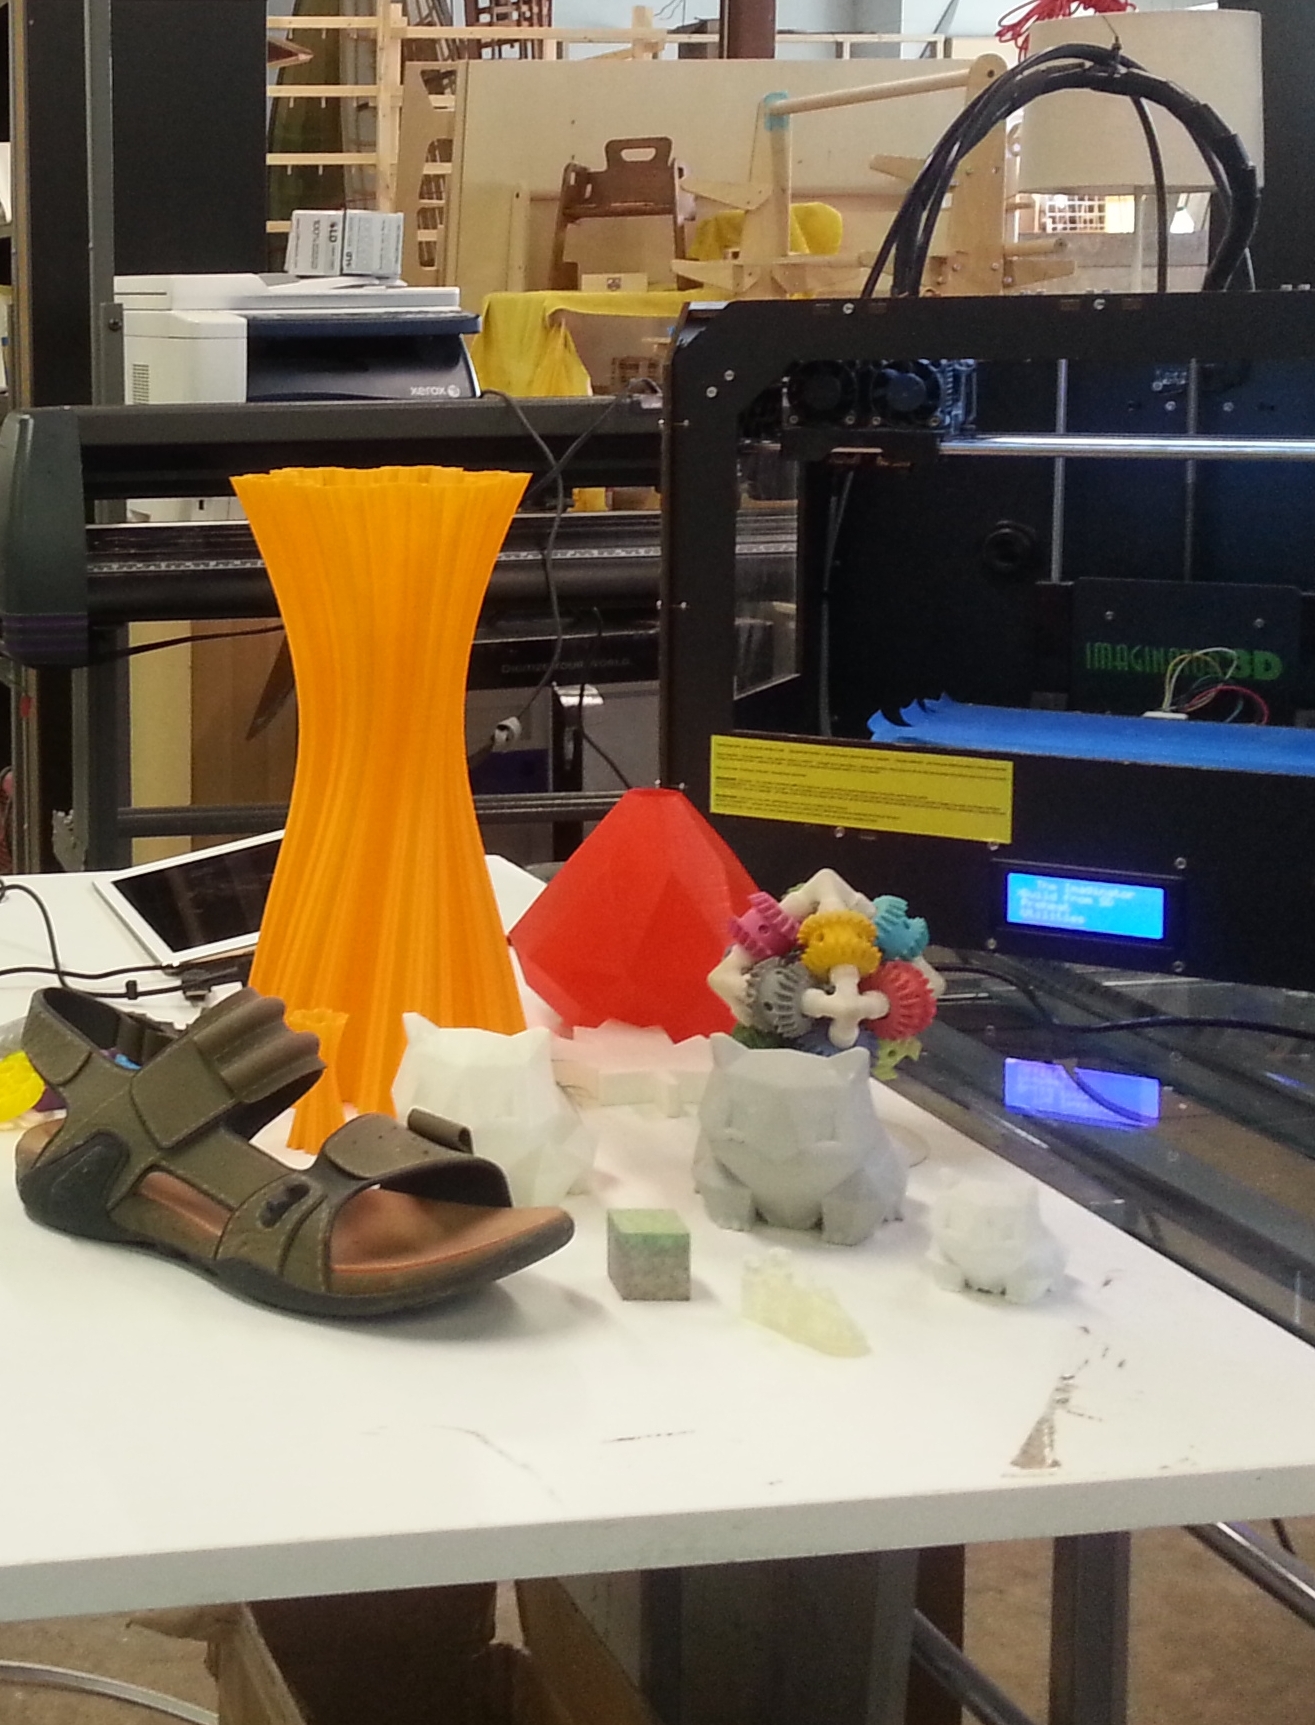
When specific materials or printers are not accessible locally, worldwide 3d communities can help print your project.
A two-story model home in Belgium was produced in one piece with europe’s biggest 3d printer.

As for the smallest, to scale printed objects, we have nano scale printers and the results are invisible to the naked eye… you need a microscope.
This to give you an idea of the world of 3d and some of the possibilities …
Repurpose and reusing
RE-using Drywall. Recycling, saving time, money and possibly breathing less voc’s from new drywall… read more about voc’s in the non-toxic section.
1- This tip is about needing to open a wall to insulate or whatever is needed then reusing the already cut to size drywall.
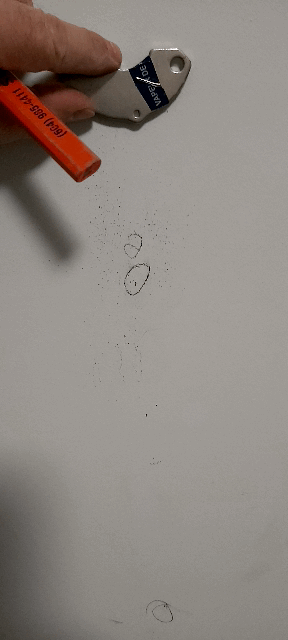
– First use a strong magnet to find all the screws on the wall. The yellow handle tool hanging from the screw is to show the magnet’s strength. The stronger the easier. This one was taken from an old computer hard drive. Two of them joined together are nearly impossible to take apart without tools.
3- Two screws located side by side usually means two sheets connecting so you can guess-timate the main seam locations. The sheets comes in 4 feet by 8-10-or 12 feet usually and are installed horizontally (not a rule). A vertical 4ft seam most always end in the middle of a 2×4 . Start searching at 4ft high horizontally from the ceiling first ( the proper way to install the top sheets ) then try 4ft from the floor if no luck.

4- Draw a line in between the pair screws all along the 8ft or longer horizontal seam then the 4ft vertical seam, ( the sheets are usually staggered hence the 4 ft high guesstimate. then cut away using an electric multi tool 30$ or a utility knife. Now unscrew everything digging in slightly. There are usually 30 screws or less per 4ft x 8ft area, from older building codes.
Ps : cut the wall that you are working on, a few inch away from the other walls and ceiling that don’t need work.

5- Do your thing (sound proofing, insulate etc). then close it all back in.
Put back the old screws at least one inch away from the previous holes. The screws should be deep enough so that you can’t feel them if you try to scrape them and not deep enough to rip the paper. There are 5 screws per 4ft of drywall ….. 2 edges then 3 in the middle, spaced evenly. Tape it and let it dry completely.
The pictures you see here involved removing one side of a wall (drywall), a door, framing the opening, then insulating the whole area reinstalling the old drywall and drywalling on both sides of the old doorway ( obviously ).
The picture shows two colors in the taping mud… grey that means deeper and wet, and white (the edges or higher up surfaces) that means dry. Aim for all white before sanding, then, paint away.
Non-toxic materials
1. Non-toxic cabinets internet search
2. Non toxic building materials internet search